Read through the entire process before starting, especially the parts that are easy to break. If you aren't confident that you have the patience, tools or ability to do it yourself, don't do it. You would be risking breaking your beautiful European machine and it might be better value to leave it to an experienced professional.
If your pattern mechanism is stuck, do not force it. The bottom gear, which drives the pattern indicator, is the first thing to break when you do this and they aren't cheap.
If the machine is very hard to turn, do not force it. The two things that break when you do are the plastic hand wheel and the take-up slide. You will probably cry.
If you can't get it into buttonhole mode, do not think you can skip this and remove the pattern mechanism anyway. Fix the buttonhole mechanism first.
The fact that I love repairing Husqvarnas means I will repair them. As mentioned, almost all sewing machine mechanics avoid these due to the work involved. In the past I haven't performed a full restoration of a seized and broken 2000 from “unused for decades” condition for someone else. This changed when a lady came into the shop one Thursday afternoon (20/7/23) with a 6460 that hadn't been used for a very long time. It was completely seized, the reverse was stuck, the camstack was broken, the buttonhole function seized, the motor brushes worn out but it looked in excellent condition otherwise. I started prior to 6am on a Friday morning (probably at 5:50) and finished the test sew at 2:05pm, having taken a total of about 15 minutes for breaks (customers picking up and dropping machines off). That's eight hours of work by someone who has a lot of experience with these, and there wasn't anything unusually troublesome about it.
So the lesson is that even for an experienced repairer, it takes a very long time to fix one of these. All of these problems are much worse due to Husqvarna's adoption of sintered bearings. Several years of being idle causes the leaking lubricant to settle on the bearings and completely dry out, effectively gluing the bearings and whatever else it has leaked onto. The good news is that by now none of the built-in lube is left, so it will never happen again (unless you ‘lubricate’ with something like WD-40 or 3-in-1 oil, which also dry out and leave a sticky residue). I repeat: do not use WD-40 or 3-in-1 on any sewing machine. If you have (or someone else has), it must be washed off and lubricated with sewing machine oil. Some sewing machine mechanics I know regularly use WD-40, and the machines are always gummed up when left idle for a few months.
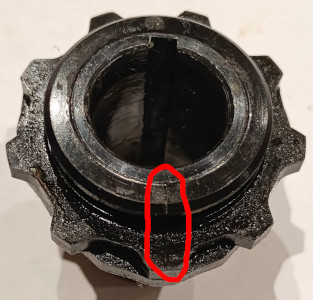
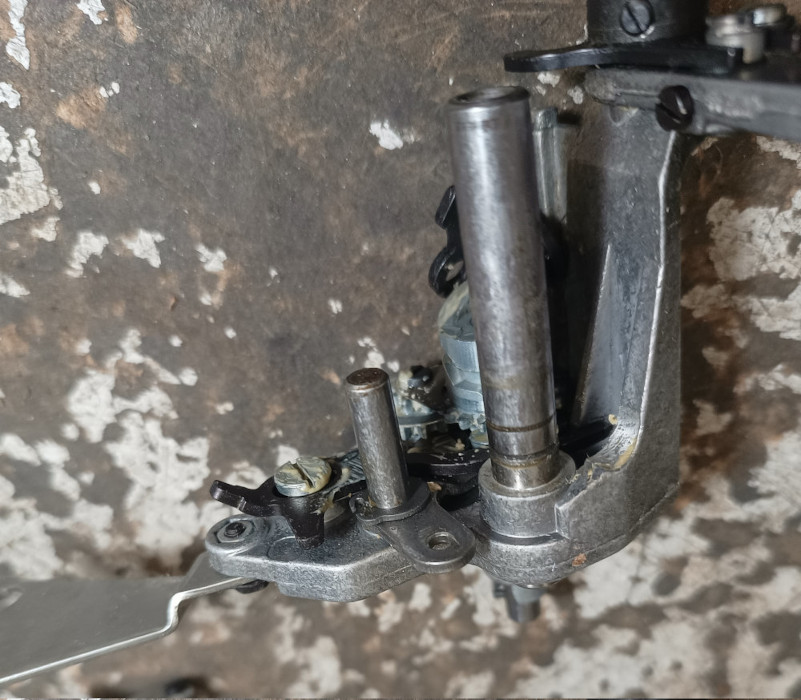
If the pattern mechanism is seized, there's a high chance that the stitch width will be very tight and you can't get it into or out of buttonhole mode (with the dial on zero width you pull the dial and it should click). This leads me to the non-aligned buttonhole issue. Get yourself a bottle of methylated spirits and put a spray top on it. Be very careful not to get it onto the exterior, as it will melt the paint I usually put a cloth around what I'm attempting to free up to absorb the excess. Spray some onto the part between the plastic and metal parts and turn the dial. It will quickly become easier and in just a few minutes it should be quite easy to turn. Now put it on zero width and look at the mechanism. There should be a U shaped male part that fits into a U shaped female part. If these are not there, the metal part (towards the front of the machine) has slipped around and must now be turned until it allows the other part to enter when the dial is pulled for buttonhole mode. Be extremely gentle here. Remember that most of the metal on a seized Husqvarna had lubricant embedded. This means that the metal is not solid and can be more easily damaged, marked or broken. Putting a mark on the metal is something you will feel later when you go to use the machine. You'll be kicking yourself for not being careful enough. If you have to use a big screwdriver, wrap cotton around it. The metal part is curved and friction will still allow it to be moved. If you're lucky, your machine now has a working stitch width and buttonhole mechanism. Now you can put it into buttonhole position 2 and continue. I have only needed to actually remove the stitch width mechanism on a couple of occasions, which is just as well: It is very time consuming.
Never attempt to force the dial, or you will break the pattern indicator gear.
After much trial and error, I discovered that it is entirely possible as well as a good idea to remove the whole pattern mechanism as a single unit. Take plenty of photos if you want to do this, and before starting download the technical briefing (service manual). If you do this job often, you should get to the point of being able to remove in under five minutes.
If you need to buy a new camstack (originals are almost always cracked), I don't sell them but Walter's import does. They aren't cheap, but these machines will never be made again.
Here are the steps to remove the pattern mechanism:
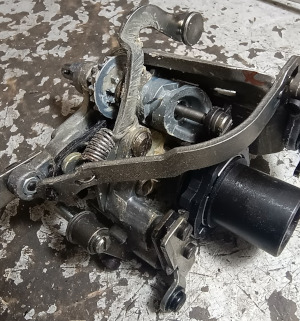
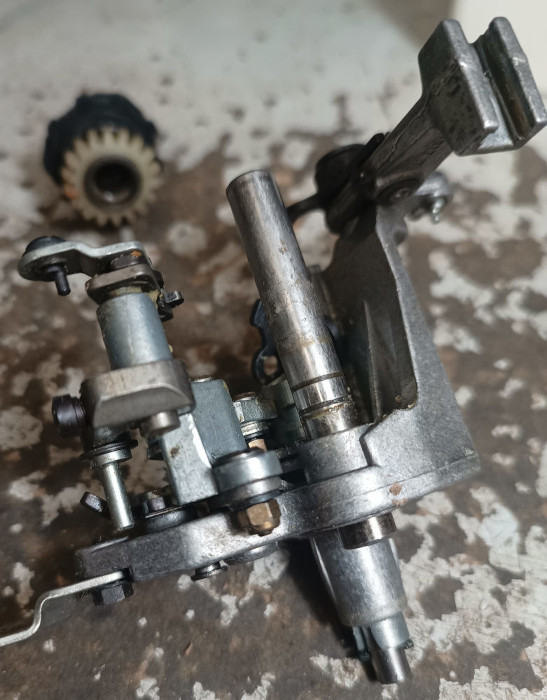
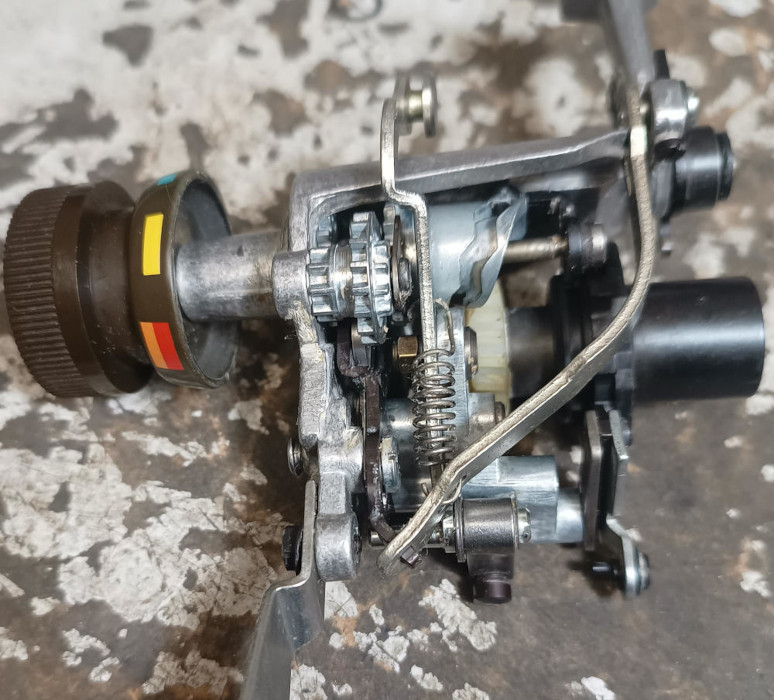
You should now have the pattern mechanism looking like the one in the picture above.
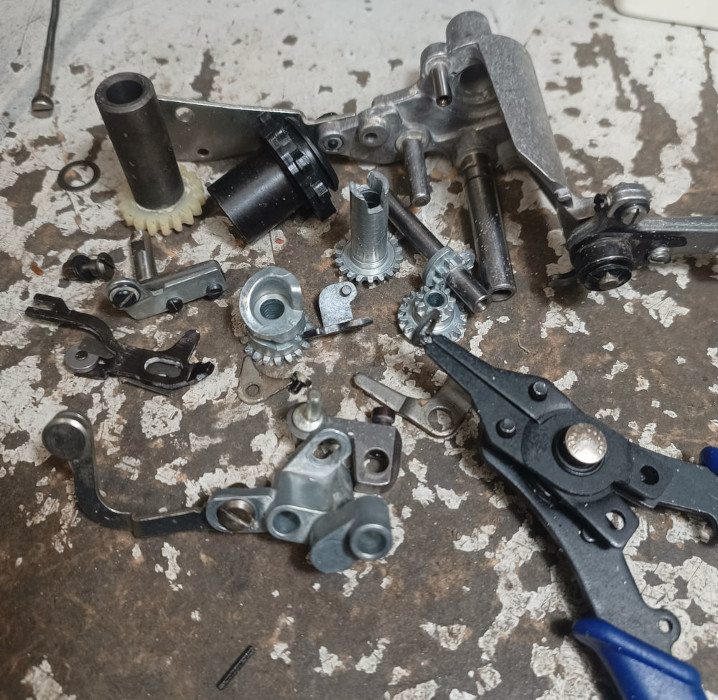
Now you need to disassemble it completely and remove all of the waxy dried lubricant. Put on some rubber gloves and have a toothbrush and solvent to clean everything.
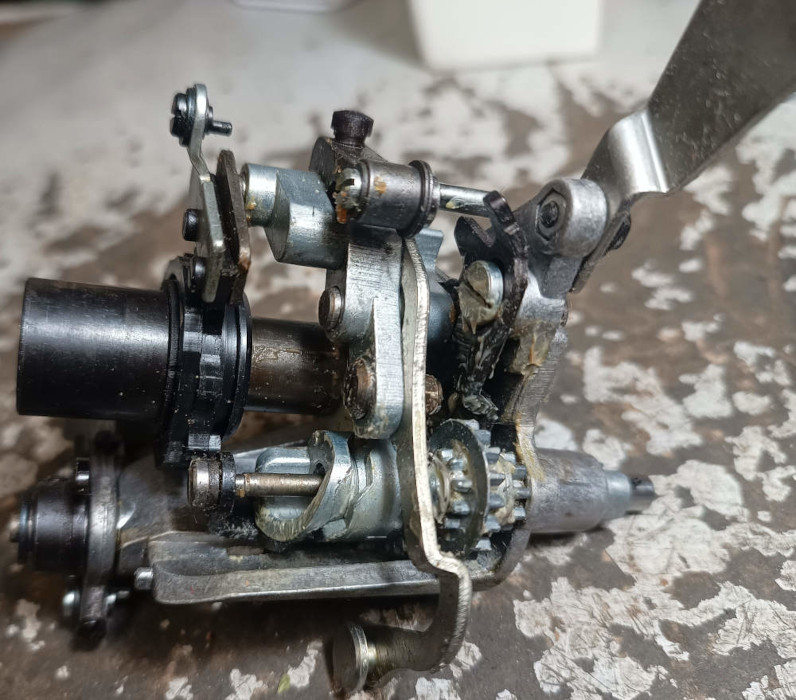
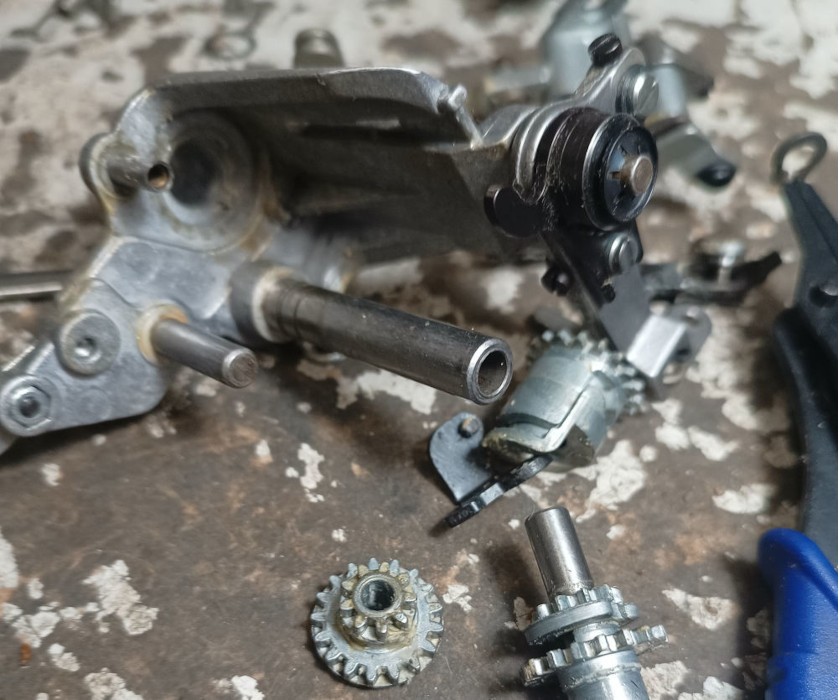
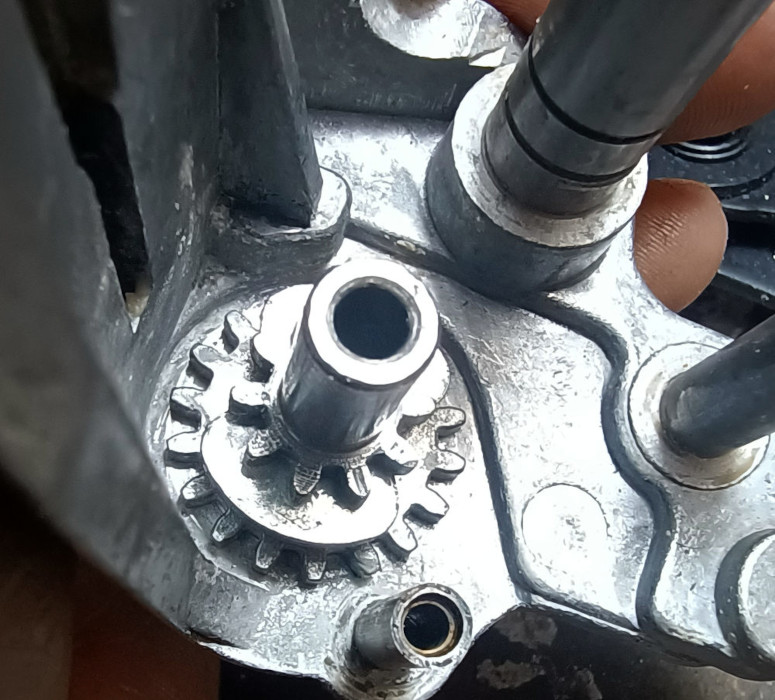
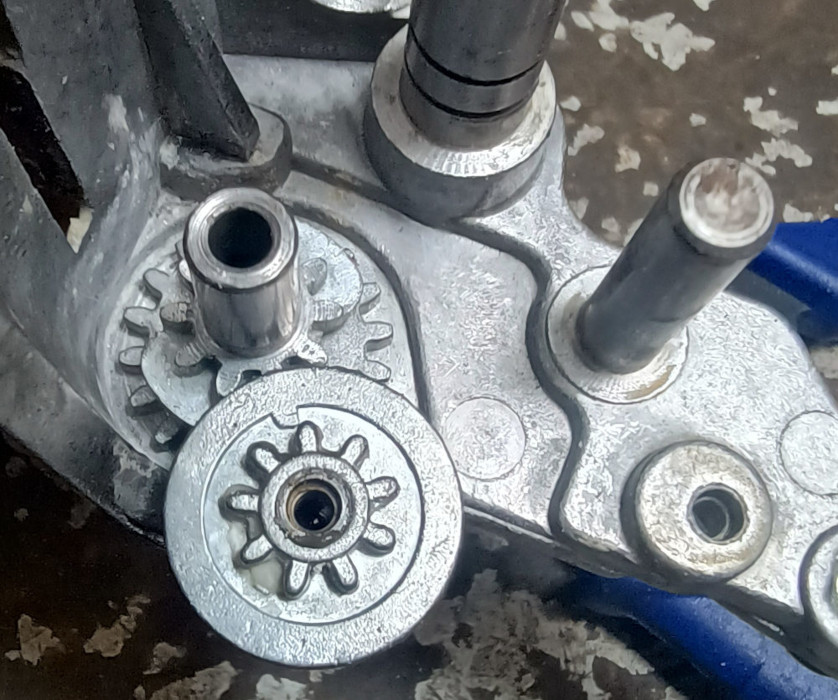


Loosen the two screws holding the shaft gear and try to turn it. If it's seized, remove both of the grub screws, and spray methylated spirits in both of the holes. Now you need to force the shaft to turn without the gear moving. Keeping it from moving isn't easy, but I've found that putting a long screw onto the grub screw threads makes it much easier. Since using the hand wheel would break it, remove it and attach some vise-grips. Use these to turn the main shaft carefully while making sure the screw can't move (use tools or the frame to stop it moving). Once it starts to move, spray a bit more, then move the gear to the left and clean the shaft. Apply a little oil, move it back into position and insert and lighty tighten the grub screws.
For people who can't read the captions well, here is what they say in long form:
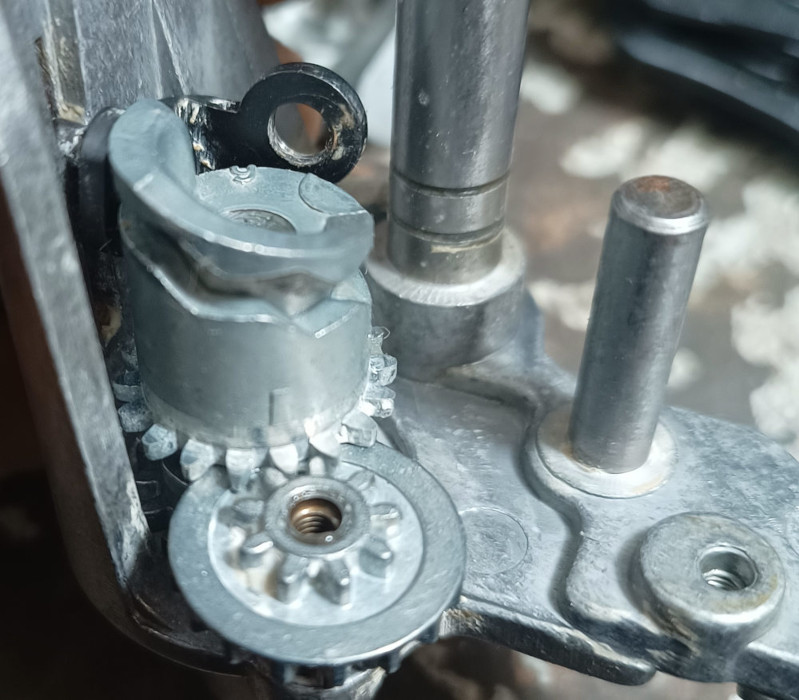
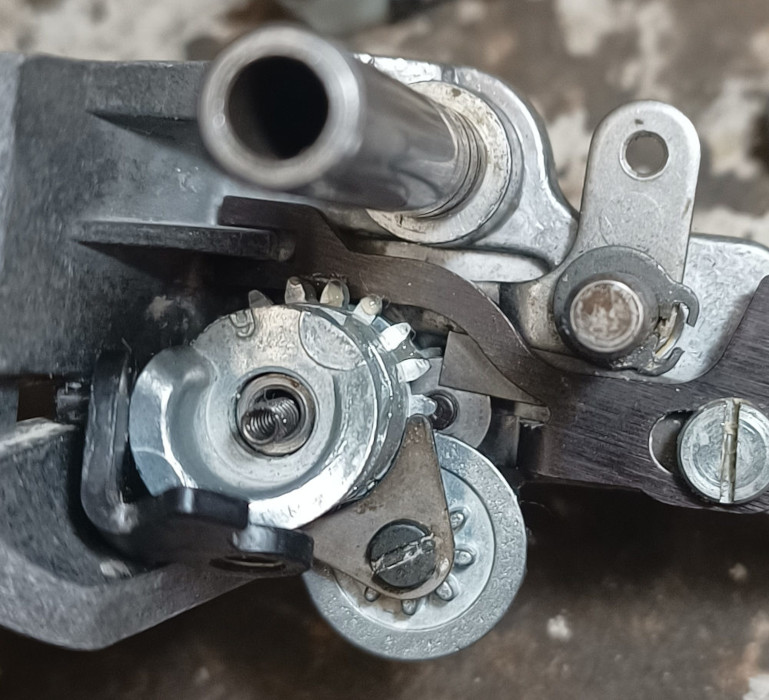
The reverse on this is almost always seized, so that's what we'll deal with. The problem is caused by dried lubricant inside the part that toggles, so we must free this up. This also take the greatest amount of time of all the seized parts.
Address: 392 Burwood Road, Hawthorn, Victoria, Australia
Phone: 0412 341 948